Food Photography 101: Taking Appetizing Photos for Your Menu
Last Updated: June 19, 2026
A study by Santhakumar (2018) of Kansas University revealed that adding images to a restaurant menu, with or without description, significantly increased overall liking, level of being informed, and purchase intent.
This only means that food photography is an effective marketing tool for the restaurant industry.
So, how will you do it?
Start by understanding the basics. This includes proper lighting, composition and styling, right angles, and capturing movement.
After that, you can distribute them through traditional prints or upgrade to a digital presentation using QR code menus and online pages.
If you’re interested in learning more about this, here’s a comprehensive guide to making your menu visually appealing to your audience.
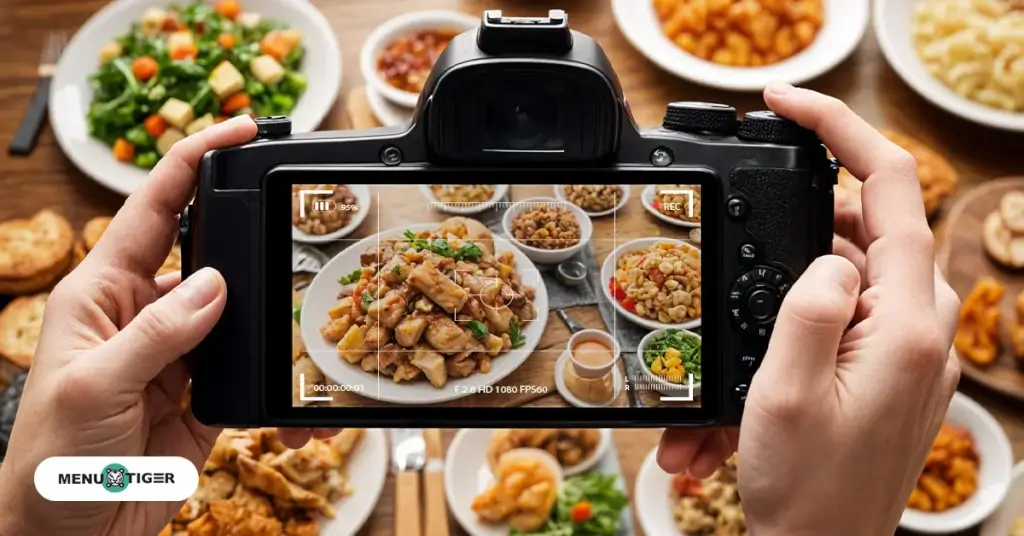
On the lens: What is food photography?
This specialized photography genre focuses on capturing images of food, which makes it more appetizing and artistic to entice the target viewers.
Upgrading your food photos through this skill requires you to understand that it is a blend of creativity, technique, and presentation.
Food photos are mainly used in restaurant branding and marketing. So, they’re mostly seen particularly in advertisements, cookbooks, menus, blogs, magazines, and social media posts to convey a specific message and highlight the quality of the food presented.
How to take food photos: Understanding the basics
Speaking of technique and presentation, we’ve compiled these basic components of taking the best pictures of your food items to help make your offerings more inviting to the customers.
Lighting is key
Lighting can make or break your food photography ideas.
An article by Mark Brion, an award-winning photographer, photo editor, and writer in Oxfordshire, United Kingdom, shared that lightning not only determines the brightness and darkness of the subject and its environment but also sets the tone, mood, and atmosphere.
The best choice is natural light, as it provides a soft, flattering illumination for the subject.
You can position your dishes near a window, using diffused light to avoid harsh shadows. If natural light isn’t available, invest in softbox lights to simulate that natural glow.
Also, experiment with bounce cards made from white foam boards to reflect light and strategically eliminate excessive shadows from artificial light.
Pro tip: When learning how to take food photos, one key element you must remember is to avoid direct sunlight, as it can create harsh shadows and overexposed spots. Use sheer curtains or move to a shaded area to diffuse the light.
Food photography composition and styling
How you arrange your food on the plate and in the frame can significantly impact the final image.
So, move beyond the basic framing. You can consider using these tips to help you out in your composition and styling:
- Rule of thirds
Divide your frame into a grid of nine equal parts and place the key elements along these lines or at their intersections.
Depending on your composition, you can place your subject at any intersections or use a negative spacing technique to highlight a specific element of the dish.
- Props and backgrounds
Use props like utensils, napkins, and ingredients to add context and interest in your menu photography. Keep backgrounds simple to avoid distractions.
- Color harmony
Use complementary colors to make the dish pop. Fresh herbs, colorful veggies, and sauces can add vibrancy to the food photos.
- Negative space
Don’t be afraid to leave empty space in your frame. Negative space can help highlight the food and make the composition less cluttered.
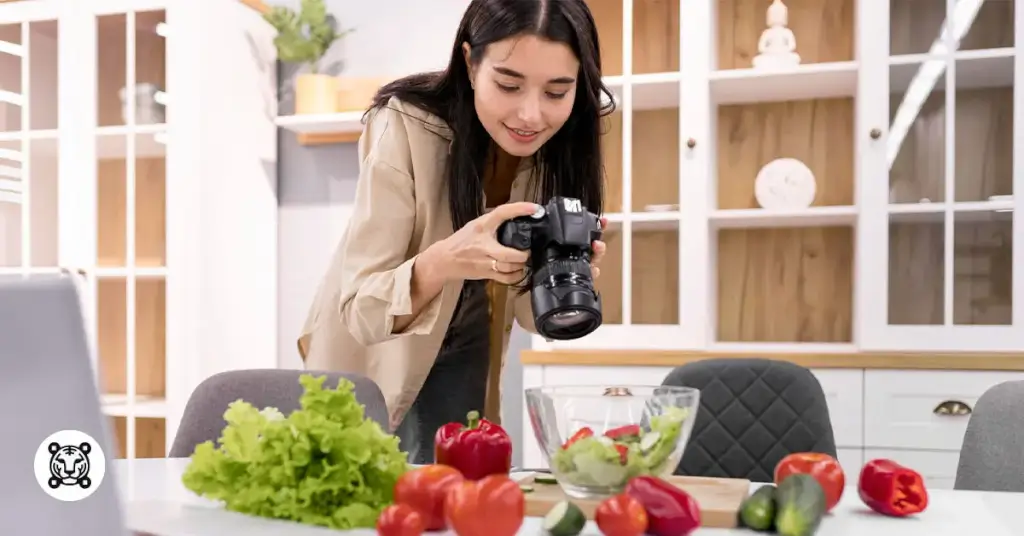
Camera settings
If you’re using a digital single-lens reflex (DSLR) or mirrorless camera, you can have more control over the settings, which further enhances your output.
This is because these cameras offer full manual control over key exposure settings, which allows you to fine-tune them to achieve the desired depth of field, motion blur, and noise level.
Also, these cameras provide you with a wide range of lenses, which gives you the freedom to choose the best lens for each specific angle or focus you want to take.
Here are a few things to remember in your setup:
- Aperture (f-stop): Aim for a wide aperture (low f-number) like f/1.8 to f/5/6. This creates a shallow depth of field, blurring the background and drawing focus to your delicious subject.
- Shutter speed: You generally want a fast shutter speed (faster than 1/125th of a second) to avoid camera shakes and ensure sharp photos, especially when shooting handheld.
Using a tripod and proper lighting, you can experiment with slower shutter speeds for creative effects, such as capturing steam rising from a hot beverage.
- ISO: Keep ISO as low as possible (typically the base ISO of your camera) to minimize digital noise or grain in your image.
If lighting is limited and you need to increase ISO, prioritize slightly higher ISO over a blurry photo from a slow shutter speed.
- Shooting mode: While Auto mode can work in a pinch, consider graduating to Aperture Priority (Av) mode.
This allows you to control the aperture for that beautiful blurred background while the camera sets the shutter speed for proper exposure. As you gain experience, explore Manual Mode (M) for ultimate control over all three settings.
Editing and post-processing of food photos
If you want to edit your photos manually, adjust the exposure so that the image is neither too dark nor too light. Then, correct the white balance to make the colors true to life. Food images often benefit from a slightly warm tone.
You can also increase the contrast to make the food pop and look more vibrant and adjust highlights to recover details in bright areas and shadows to bring details in darker areas.
Use editing post-processing software like Photoshop or Adobe Lightroom to achieve this. These tools also provide presets where you can explore various filters that you want your final output to look like.
Learn to use tools like split toning to add subtle color washes and gradients or experiment with selective adjustments to tweak specific areas of the photo.
Angles and perspectives
Testing out various perspectives can reveal the most enticing aspects of your culinary creations.
But for food images, overhead shots or flat lays are something you should consider. These are taken directly from above, creating a bird's eye view of the food.
This angle is particularly effective for compositions that are laid out flat and for dishes with multiple components, such as salads, charcuterie boards, and baked goods.
You can also try a 45-degree angle shot. It is taken diagonally, halfway between an overhead shot and an eye-level shot.
This is one of the most popular angles in food product photography because it provides depth and a more natural, inviting look.
You can use these shots on your main courses, plated meals, and desserts.
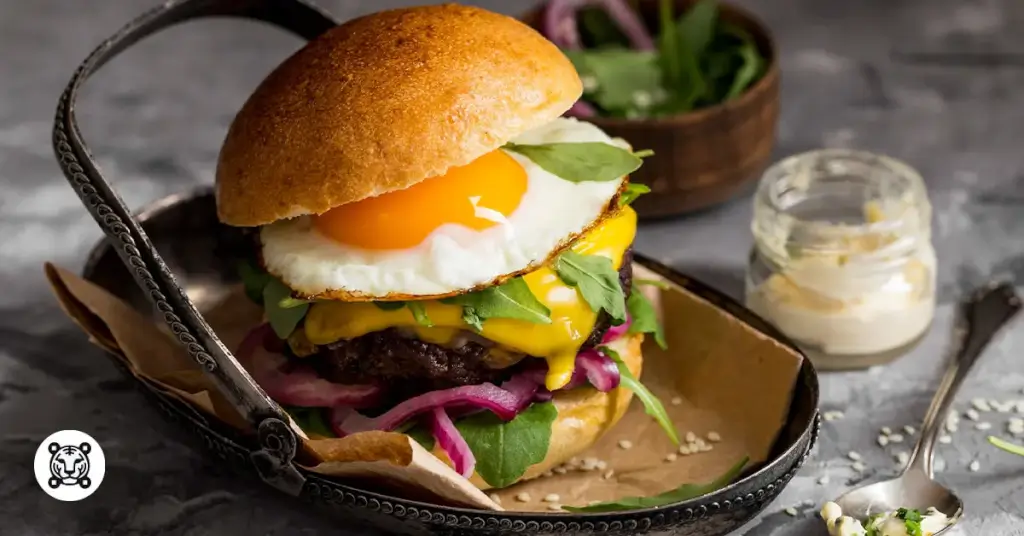
The other is an eye-level shot, taken at the same height as the food item, providing a head-on view.
This perspective is excellent for emphasizing the height, structure, and layers of food like burgers, sandwiches, and tall beverages.
Capturing movement
Adding a human element or some action can make your images more dynamic.
Capture moments like pouring syrup, sprinkling herbs, or cutting into meat or vegetables.
Use a fast shutter speed to freeze the action or a slower one to create a motion blur effect on your output.

Practical tips for food photography ideas you can apply
Be consistent in your style
Maintain a consistent style across all your photos in your social media for restaurants and websites. Just make sure you have a theme—whether rustic, modern, minimalist, or vibrant—and stick to it.
This cohesiveness helps build your brand identity and makes your menu visually appealing.
Remember that consistency is key to strong visual branding, making it easily recognizable to your target audience.
Highlight your star ingredient
Focus on the most enticing part of the dish.
If it's a steak, let the juicy, seared be the hero. For a dessert, highlight the creamy texture or the decadent topping.
Use selective focus to draw the viewers’ eye to this element.
This photography technique places your chef’s culinary skills to the center stage, highlights the mouthwatering food composition,, which encourages customers to give your menu item a try.
Avoid overcrowding the frame
While it’s tempting to show off every ingredient in your food, overcrowding can make the image look unappetizing.
Keep it simple and let each component have its space.
Remember, negative space can be very effective in drawing attention to the main subject.
5 common mistakes to avoid when taking photos for your menu
Ignoring the details
Small details matter.
Removing stray crumbs from the scene ensures a clean and professional look, keeping the viewer’s focus on the food.
Cleaning any smudges from the plate is equally important, as these can make your photo appear sloppy and unappealing.
Keep garnishes fresh so that they can add to the dish’s visual appeal, making it look more appetizing and well-prepared.
Overediting
Overediting in photography of food can look artificial.
Avoid using excessive saturation and sharpening. Doing so can distort the natural appearance of the food.
Remember that your goal is to enhance the item's natural beauty, not to create a cartoonish effect.
Keeping edits subtle and realistic helps maintain the food’s true colors and textures, making it look as delicious in the photo as in real life.
Inconsistent lighting
Inconsistent lighting can disrupt the visual flow of your menu.
To maintain a uniform and professional appearance, ensure that your images are taken under similar lighting conditions.
Consistency in this element helps create a cohesive and appealing presentation, making the entire menu look well-planned and harmonious.
By controlling the lighting environment, you can guarantee that the colors and textures of the food are accurately represented. This enhances the overall quality of your food photography ideas.
Ignoring storytelling in food photography
Every dish has a story.
Whether it’s the origin of the ingredients you’re using, the chef’s inspiration, or the seasonal context, incorporating storytelling elements or restaurant themes can make your photos more engaging.
You can use props, backgrounds, and even hands in the frame to convey a narrative.
This adds depth and interest, drawing viewers in and making the food more relatable. The unique story behind each of your dishes can create a richer visual experience that resonates with your audience and enhances the overall impact of your images.
Neglecting the basics of cleanliness
Fingerprints on glasses, smudges on cutlery, and greasy spots can be turned off.
Always double-check for cleanliness before and during a shoot. A pristine presentation is essential for enticing output.
Making sure that all elements are spotless can enhance the visual quality and communicate professionalism and attention to detail.
High standards of cleanliness make the food more appetizing and inviting, which is crucial for capturing the customer’s interest and appetite.
QR code menu software: A digital avenue for your masterpieces
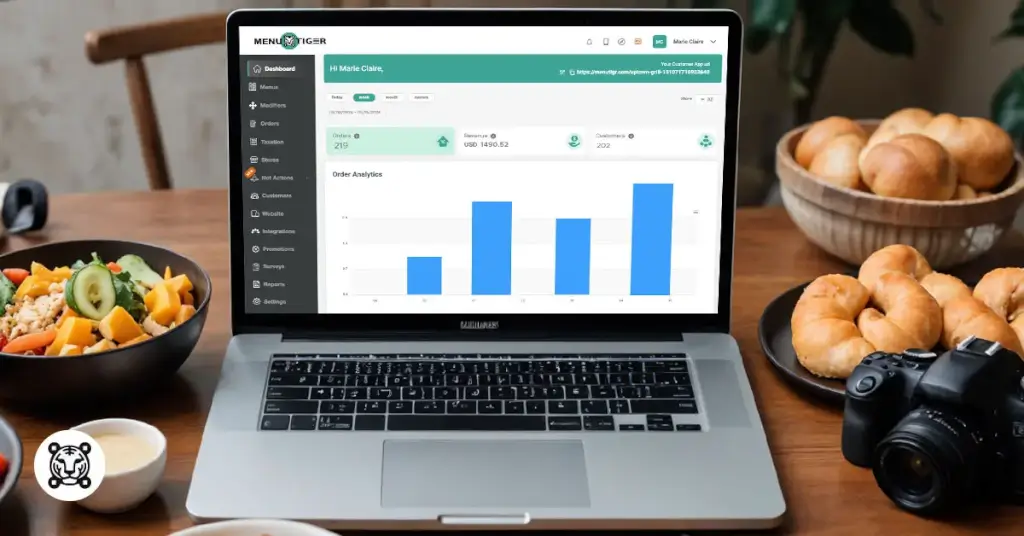
What makes your customers want to buy something from your restaurant isn’t just about how well you do in your promotions but how well your visual presentations are.
One effective platform that can give justice to your images is to present them digitally.
But you might think, How am I supposed to do that? Do I have to buy expensive monitors just to display them?
Here’s the good news: You don’t have to spend on additional technologies. With MENU TIGER QR code menu software, your customers can access carefully curated images using their mobile phones and order them instantly.
Take a look at these offers once you’ve used this smart menu software:
Digital restaurant menu QR code guarantees high-definition photos
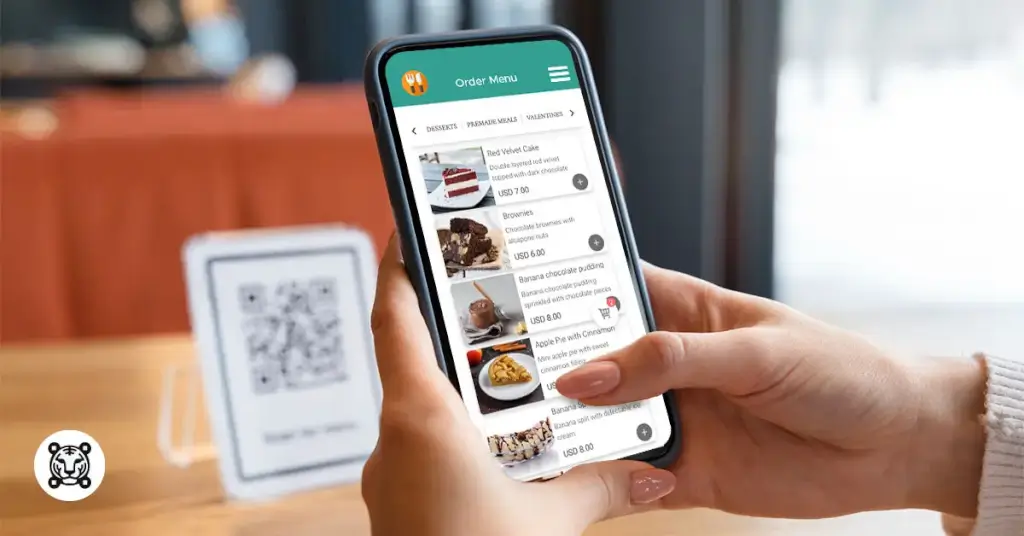
You can upload your photos with vivid descriptions, allowing your customers to see them for themselves by scanning a digital menu QR code using their devices.
They are then directed to your virtual menu that contains menu item details such as allergen information, prices, and food modifiers without the need for them to be accommodated by your staff.
Take note: For a smoother transaction process, make sure to put simple instructions on how to scan a menu QR code to cater to those customers who are not familiar with it.
Personalized restaurant website
Using this smart food menu QR code software, you can build and create a web design for restaurants and other businesses. Here you can freely add photos, videos, and other elements that you find suitable, reflecting your brand’s personality and identity.
You can link your social media accounts on the site so that your audience can visit your social networks to learn more about your brand.
Efficient menu ordering and payment transactions
Once your customers have decided to try your food, they can order and pay them instantly with MENU TIGER’s Stripe PayPal payment integration for restaurants in which they don’t need to wait in line at the counter or for the bill to come to their table.
This level of ease gives your customers time to enjoy your offerings visually through those images and feel the satisfaction they feel when they eat without being rushed.

1…2…3… Click: Display your best food shots using MENU TIGER QR code menu software
You’ve probably realized that food photography isn’t just about taking photos whenever or wherever you feel like it.
It involves a meticulous process that needs your attention, creativity, and technique.
But that does not mean you can’t achieve that. That’s why we’ve prepared this comprehensive guide, which discusses the foundational and essential key points when taking photos for your offerings.
We’ve also included a way for you to exhibit your masterpieces using QR code menu software like MENU TIGER. This can give your images the necessary exposure that will surely appeal to your customers' tastebuds.
If it interests you, you can visit the website, sign up, and see how your pictures can blossom into something big.
FAQs

Chevy
Before joining MENU TIGER's Content Team, Chevy has been dabbling in literary arts for five years, specifically creative writing in a theatre company. She loves exploring her creativity through painting, photography, and contemporary dancing.
Affiliates
© 2026 Menu Tiger. All rights reserved


